About 6 months into our new home we found ourselves with a problem. We had great control over our fans, and smart outlets which provided us control over lighting in our living room and backyard. Life was GREAT… Until, one evening after an exhausting day; while laying in bed, my wife and I looked over at the bathroom and saw, to our horror that the lights had been left on. We knew what this only meant one thing. One of us, NOT ME, was going to have to make the trek over and turn off the lights. I made a proposition to my wife, I said “I will fix this problem permanently if you get the lights”. To my great joy I did not have to get out of bed!
This left me with a task, I had to come up with a way to control the lights in my bathroom without significantly altering anything. My solution also had to be affordable and HomeKit compatible.
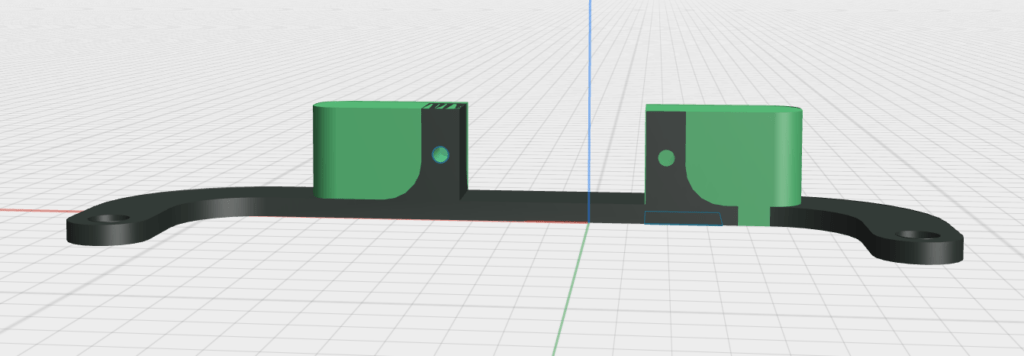
I ultimately decided that the best way to build this would be to make a robot designed to manipulate the switches for us. Based on past projects, I decided to use the ESP8266 with ESP8266-HomeKit and would reuse a small Servo leftover from some 3D Printed RC Cars I had built in the past. To mount everything I would design or re purpose a 3D printed bracket to mount the servos to my light switch. For my mount I actually opted for both. I found this file https://www.thingiverse.com/thing:22936 which worked quite well except the servo mounts were too weak, so I made a file that added more material to the mounting points for the servo.
I like to compare costs of my builds at times. This is the current cost break down.
With these materials at this total cost of $67 a hobbyist can make 6 of these devices.
If they decide to repurpose old power bricks laying around they could build 10 of these devices for $57 or a cost of $5.70 per device
Servos $19 / 10
ESP8266 D1 Mini (Clone) $23 / 10
Brick Charger $10 /6
Micro USB Cables $15 / 12
I like this cost
Meet Flippy!!
I decided to refer to my robot as “Flippy”. His purpose is to turn my lights on and off.

Flippy was pretty straightforward tu build all around. But a fun 3 hour project for me. I was also able to install a Flippy in my kids’ room as well which allows us to turn the lights off for story time without having to get up!
In my gitlab repository you will find all the code as well as my modified STL file
https://gitlab.com/iot-hacking/flippy/-/tree/main/
No idea is original and everything is built at different times. Here are some more solutions to the same problem I found on Thingiverse.
This is a complete solution that is very clean https://www.thingiverse.com/thing:2848069
This is the bracket I started with https://www.thingiverse.com/thing:22936
They used two servos to control two switches. https://www.thingiverse.com/thing:4244054